It’s almost impossible to avoid germs. Whether you are grabbing a door handle or flipping a switch in your own home, or pushing the buttons on a public elevator, bacteria lives on each and every surface. Of course, washing your hands regularly can help keep these germs at bay, but there are other items that you may forget to clean that can carry and spread bacteria.
Your cell phone, for example, travels with you everywhere you go. You place it down on tables and countertops, and hold it in your hands and close to your mouth. But how often are you really cleaning it? In a study conducted by Harvard Health, 24% of Americans disinfect their phones less than once per year. Though this doesn’t need to be a daily task, and because your cell phone is host to plenty of germs, it’s important to keep it clean.
A good cleaning doesn’t take much time, and you likely have all of the right materials to stave off germs right at home. Here are step-by-step instructions to properly clean your cell phone.
Step 1: Remove Case and Power Down Device
Unplug your phone from the charger and remove any headphones or other cords, and turn it off. To ensure a deep clean, remove the case and set aside to clean separately before you put it back onto your device.
Step 2: Wipe Down With a Microfiber Cloth
Using a clean microfiber cloth, gently polish off your phone, removing any smudges, dirt and dust. Due to the friction between the cloth and the glass surface of your screen, this will help to remove germs. Avoid paper towels or old washcloths, as they will not absorb grease or dirt particles.
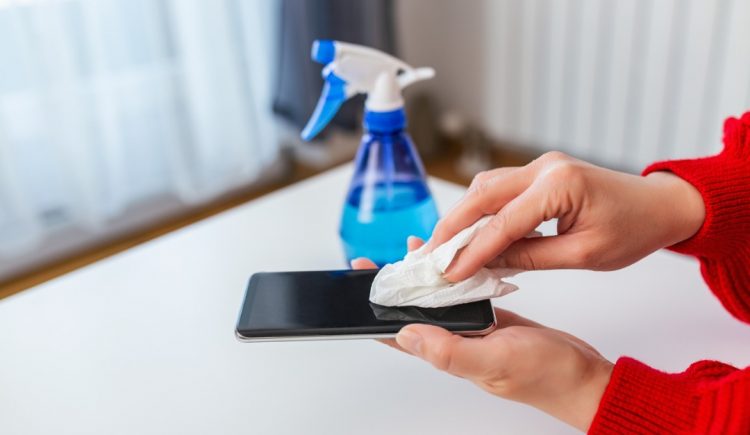
Step 3: Disinfect With Spray or Wipes
Wipe down your polished phone with either a disinfecting wipe or a one-to-one mix of distilled water and isopropyl alcohol to remove any germs and bacteria. If you choose to use spray, be sure to spray onto a new, clean microfiber towel and wipe all around the phone. Be sure to clean the front, back and side of the phone, avoiding plug ports.
Step 4: Clean Out Small Areas With a Q-Tip
The small areas on your phone, such as the space around your camera lens, attachment ports or buttons often have build-up of grime and grease. Gently use a dry, clean cotton swab to clean these areas. Do not spray with cleaner, as this can damage the ports. Once any build-up is removed, wipe down the surrounding area with your cloth again.
Step 5: Allow the Phone to Air Dry
Most disinfectants work best when left on the surface for 10 minutes. Once you finish wiping down your phone, allow it to air dry. If after 10 minutes, the phone is still wet, gently dry with a new, clean microfiber cloth.
Step 6: Clean Your Phone Case
Repeat the same cleaning process to your phone case, especially the outer side, as this is what sits on most surfaces and in your hands. For silicone cases, completely submerge and wash in a warm water solution with a light dish soap. Use a microfiber cloth to gently scrub any textured edges. Rinse well and air dry. For a plastic cover, follow steps 1-5. Be sure that your case is completely dry before reinserting your phone.
Again, you don’t have to follow this cleaning process daily, but you should deep clean your phone once every week to fend off germs and bacteria. Be cautious of the surface that you touch or leave your phone sitting on, and keep a clean microfiber cloth at your desk, in your purse or in your car for a quick and easy way to maintain a clean, grime-free phone.


